


According to our previous post, we successfully created a basic countdown timer UI with +1 and + 10 buttons, now we need to create other functions to make our timer work.
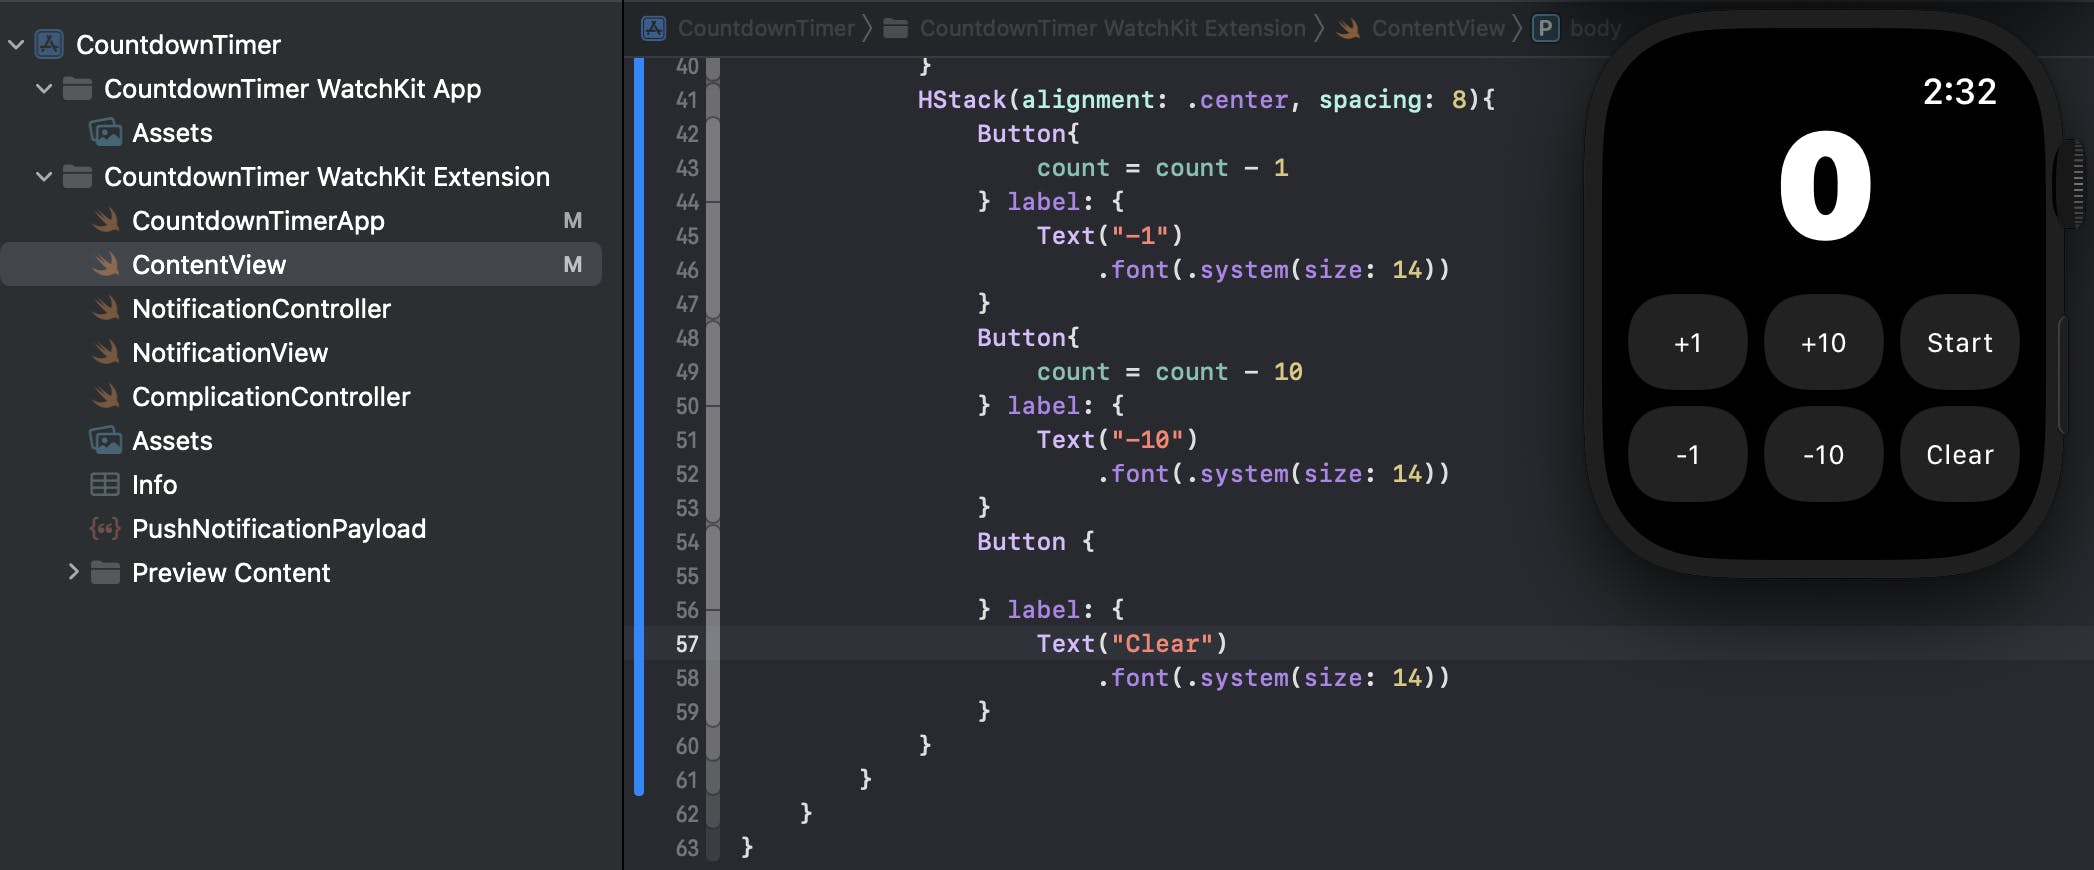
But before we add functionality to the start button, I’d like to add three more buttons for -1, -10, and clear, to give more features to this countdown timer:
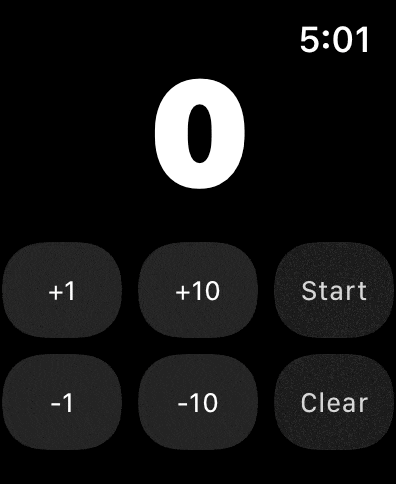
Step 9. After the current HStack, create another HStack and add three buttons for -1, -10, and clear. We use the same alignment and spacing for both HStack and the same setting for all buttons. Remember to set correct logic inside those button blocks, count = count - 1 for -1 button and count = count - 10 for -10 button.
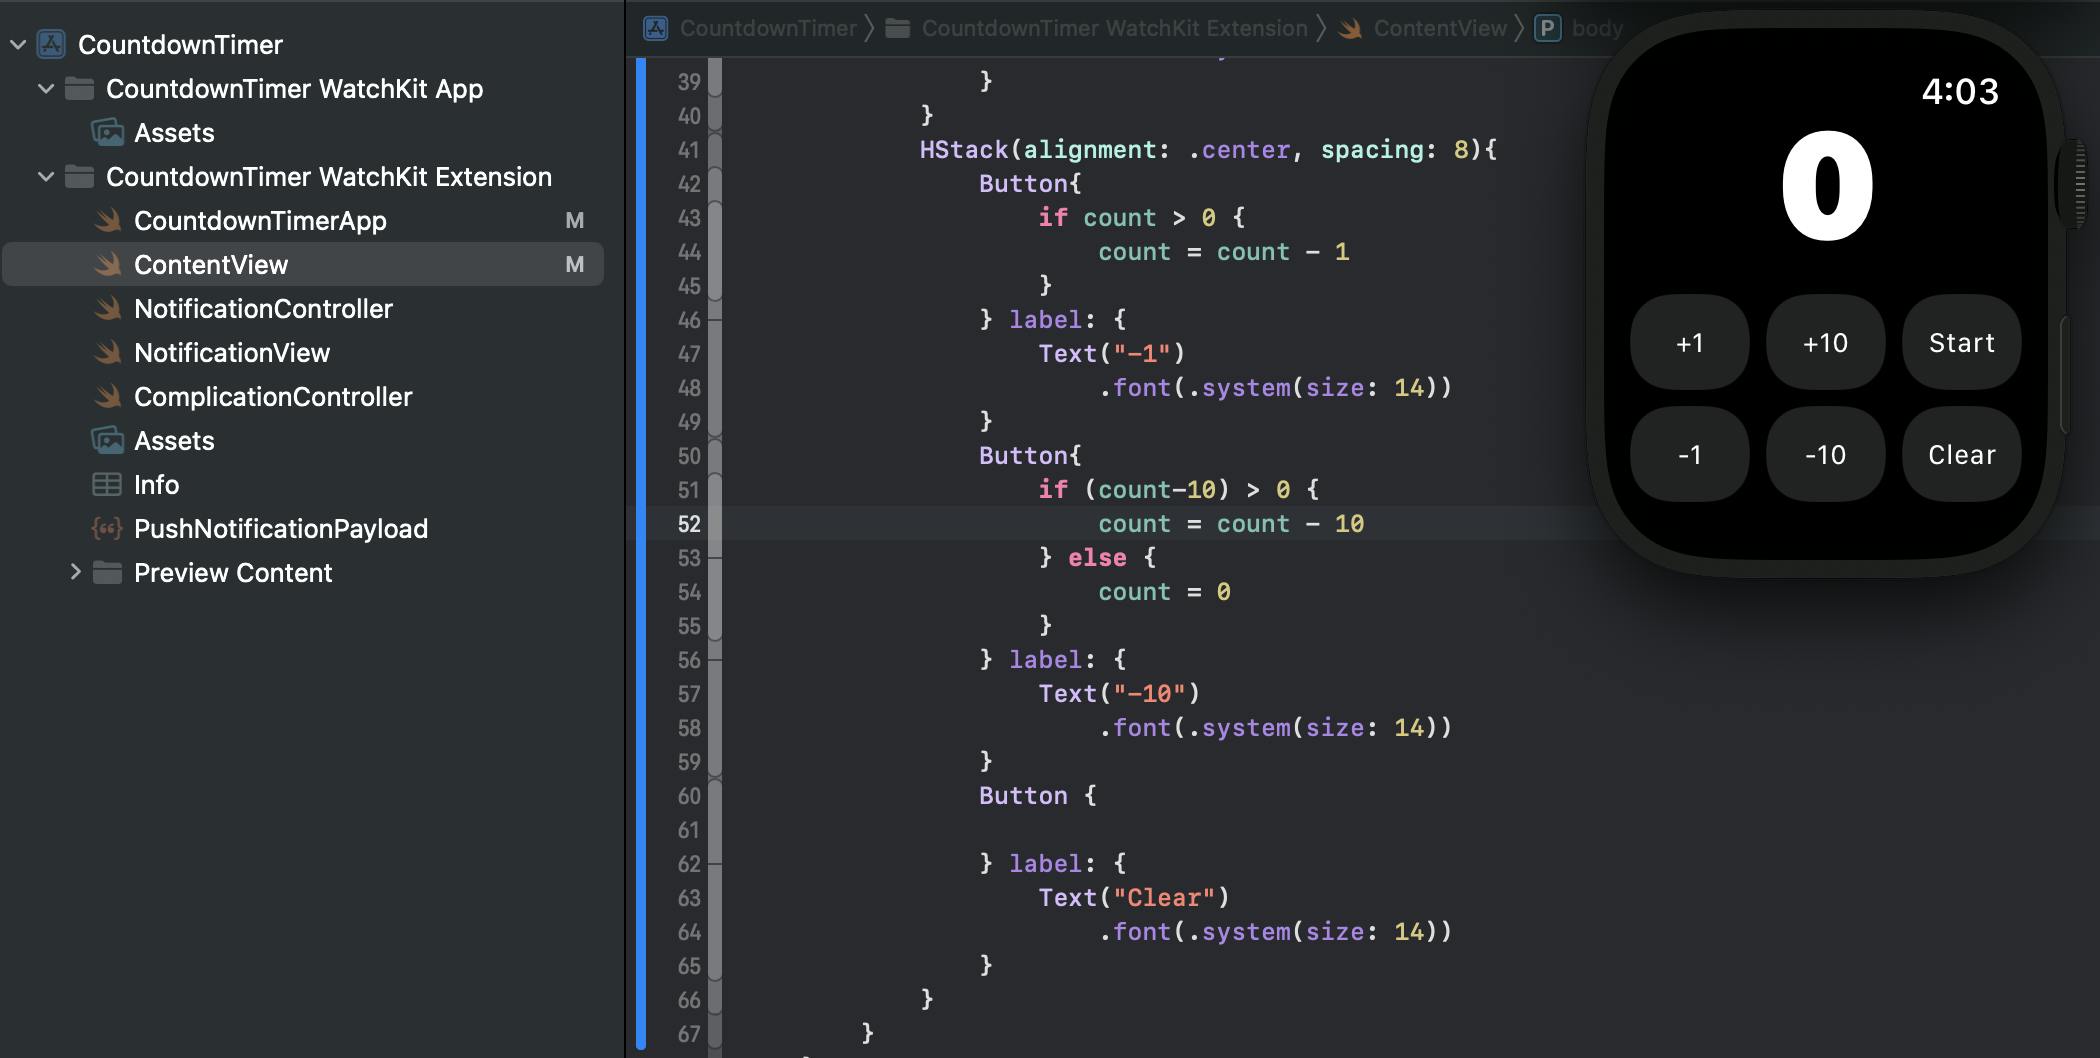
Step 10. After we built our application, we can find there are 6 buttons on the screen now. And here comes a thing. When we create buttons for increasing the number, it works fine. However, for those buttons that decrease the number, we will have trouble if we don’t set some restrictions, for example, you will get a minus number, and this is the thing we try to avoid. For -1 and -10 buttons, add if else statement to assess whether the button will execute the logic or not.
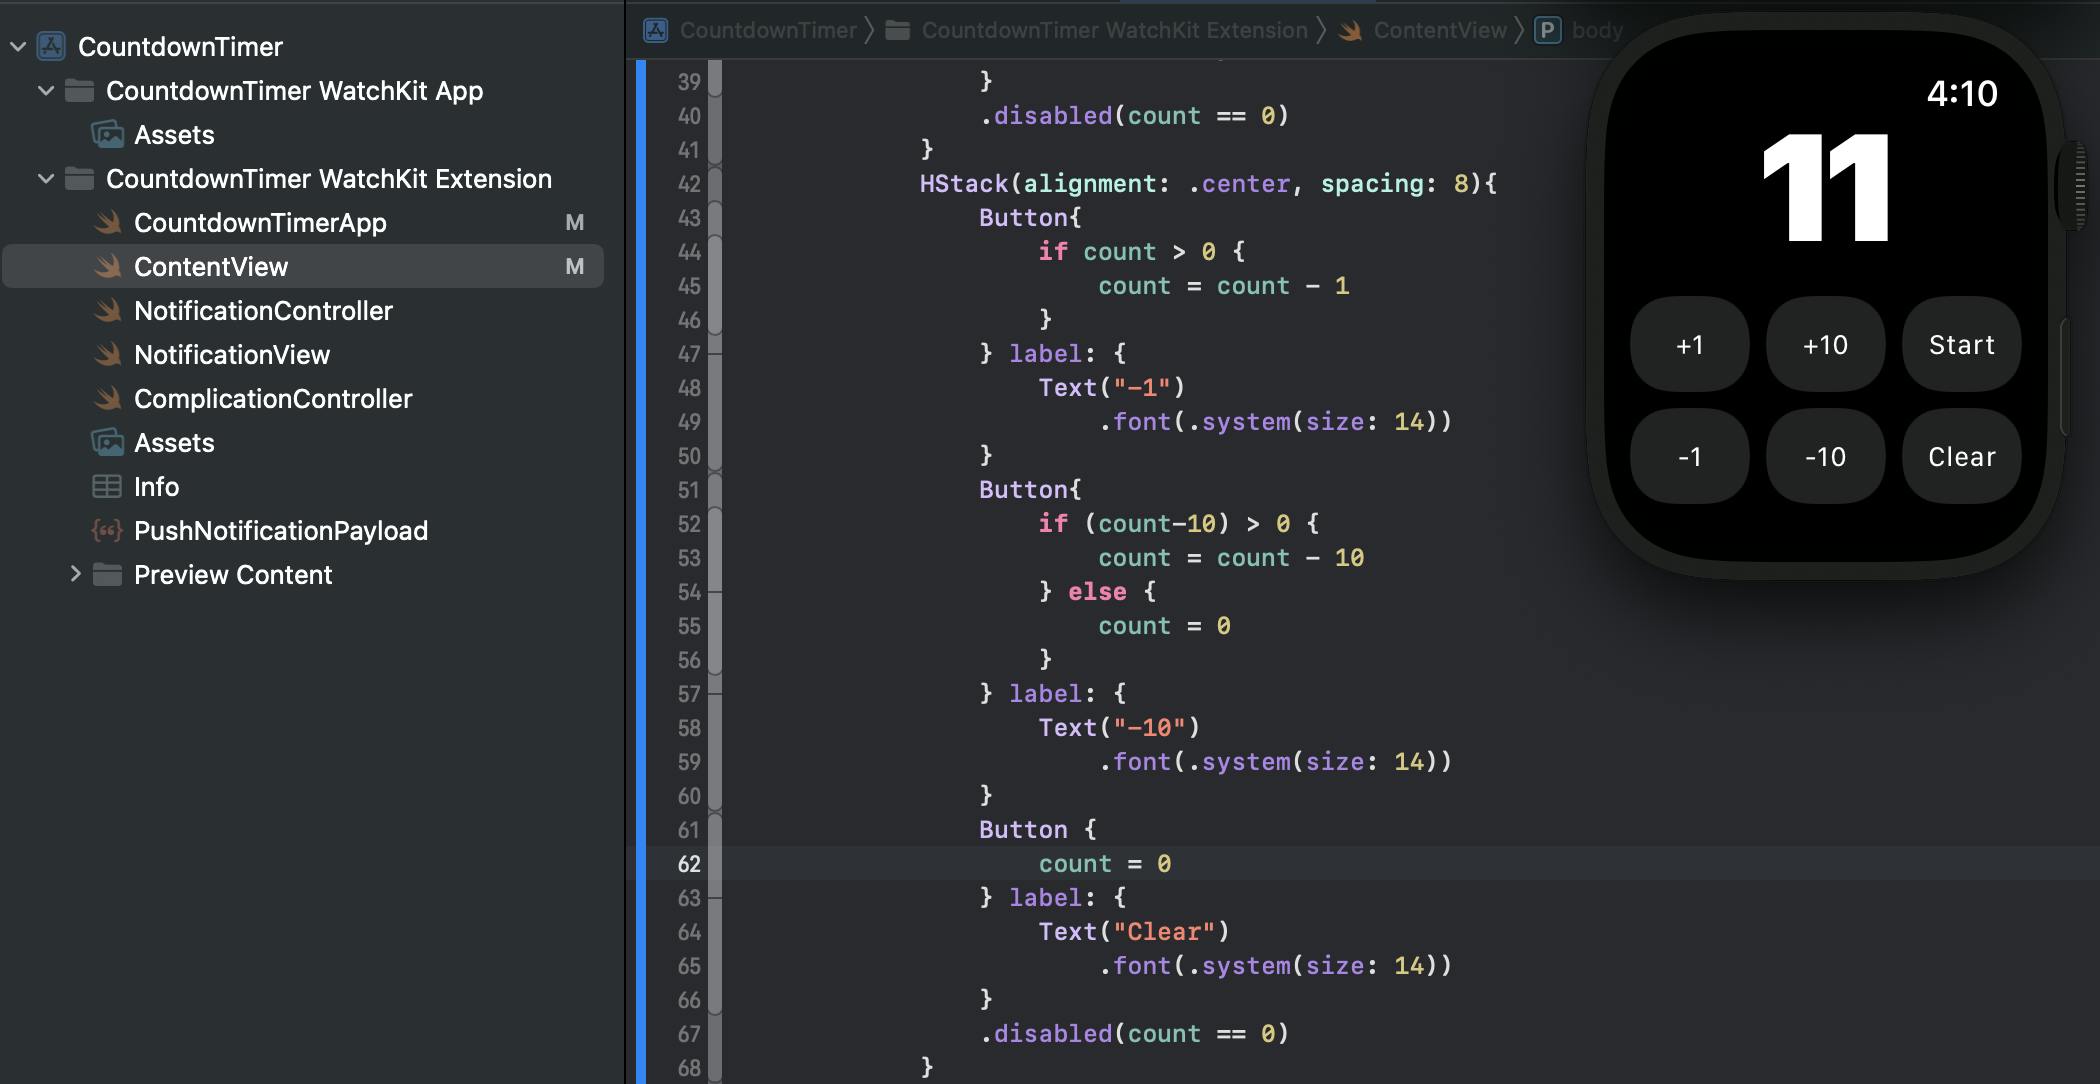
Step 11. Now we need to deal with our “Start” and “Clear” buttons. We want these two buttons disabled when the value is 0, so we can add .disabled(count == 0) to these two buttons. Also, for the “Clear” button, we want to reset the value to 0, so we need to add count = 0 into the “Clear” button block.
Step 12. Next, we need to make our “Start” button work. To accomplish the countdown function. First, I’d like to introduce “Combine” – According to Apple’s developer documentation, it’s a framework that can customize handling of asynchronous events by combining event-processing operators. It declares publishers to expose values that can change over time, and subscribers to receive those values from the publishers. Check the definition in the documentation:
The Publisher protocol declares a type that can deliver a sequence of values over time. Publishers have operators to act on the values received from upstream publishers and republish them.
At the end of a chain of publishers, a Subscriber acts on elements as it receives them. Publishers only emit values when explicitly requested to do so by subscribers. This puts your subscriber code in control of how fast it receives events from the publishers it’s connected to.
The function we want to use is called Timer, which uses the functionality of “Combine” such as publisher and subscriber.
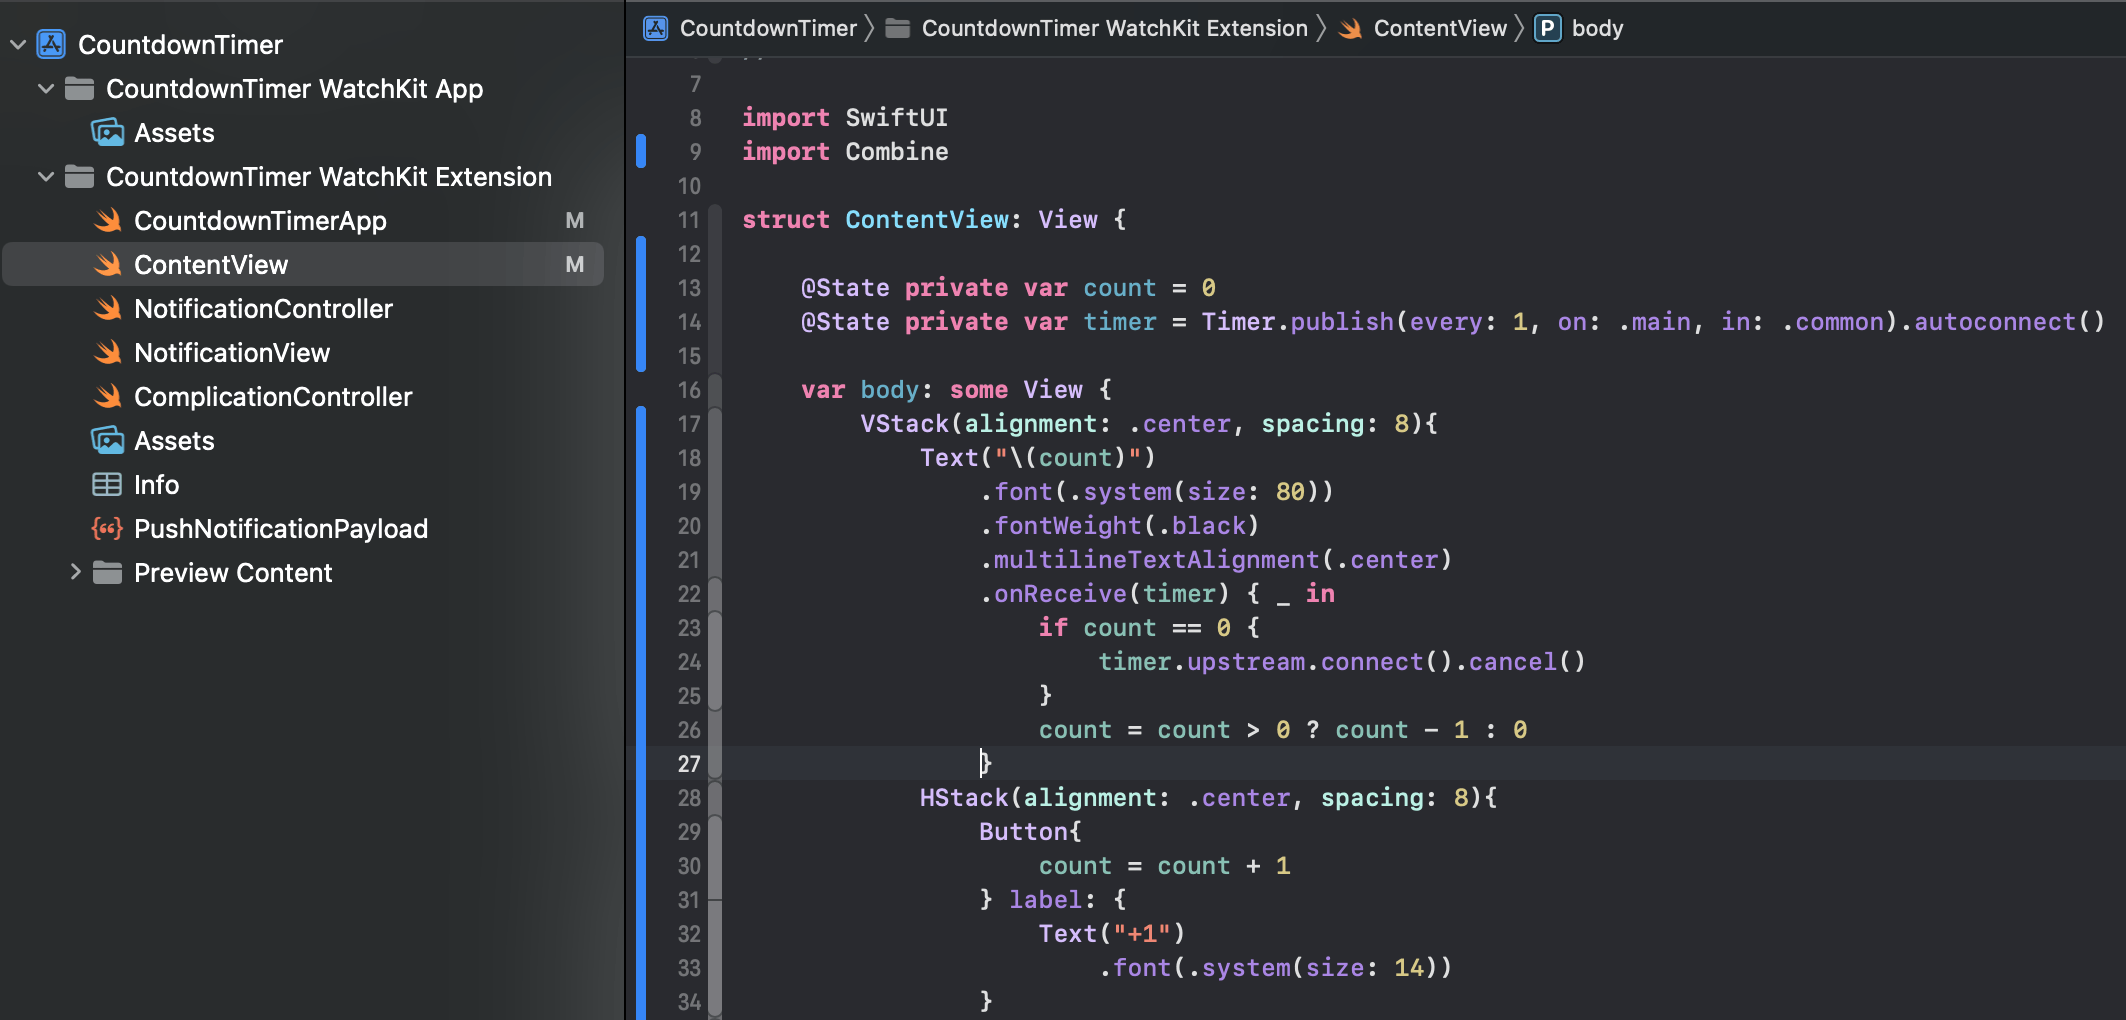
Then back to our code, we need to import Combine, and we declare an Observed variable called timer as our publisher. Next, we need to add an “onReceive” function in our count Text element. Here we also add an if statement to check if the count is equal to 0, we will disconnect the timer.upstream. By combining these functions, we can update our count’s number every second until the count number is equal to 0.
Step 13. For the “Start” button, we need to make it start to countdown when our user taps the button, so we set the publisher Timer to autoconnect, and change the value every second.

Step 14. Now we can test our application. By checking the gif below, we can see our countdown timer works!
Here we create a simple countdown timer using Swift step by step, you can find that the code itself is easy to understand. Even though we still need to do further improvements to remove bugs for the current countdown timer, we did a great job creating an application. By practicing again and again, we can finally get familiar with this popular native programming language.