


As one of the native programming languages, Swift has many useful and straightforward ways to create a native iOS app in the SDK called XCode. However, if you are new to Swift programming, you might find that there are so many differences between web-based programming language and native-based programming language. Swift is similar to those OOP languages, it is exclusive for iOS platforms and even easier.
As a beginner of this programming language, I’d like to code a countdown timer using Swift. Following the instructions step by step, we can easily create an appealing, functional watchOS.
Let’s start.
Step 1. Open a new project in XCode, remember to choose watchOS -> Watch App as your starting template, press “Next”.

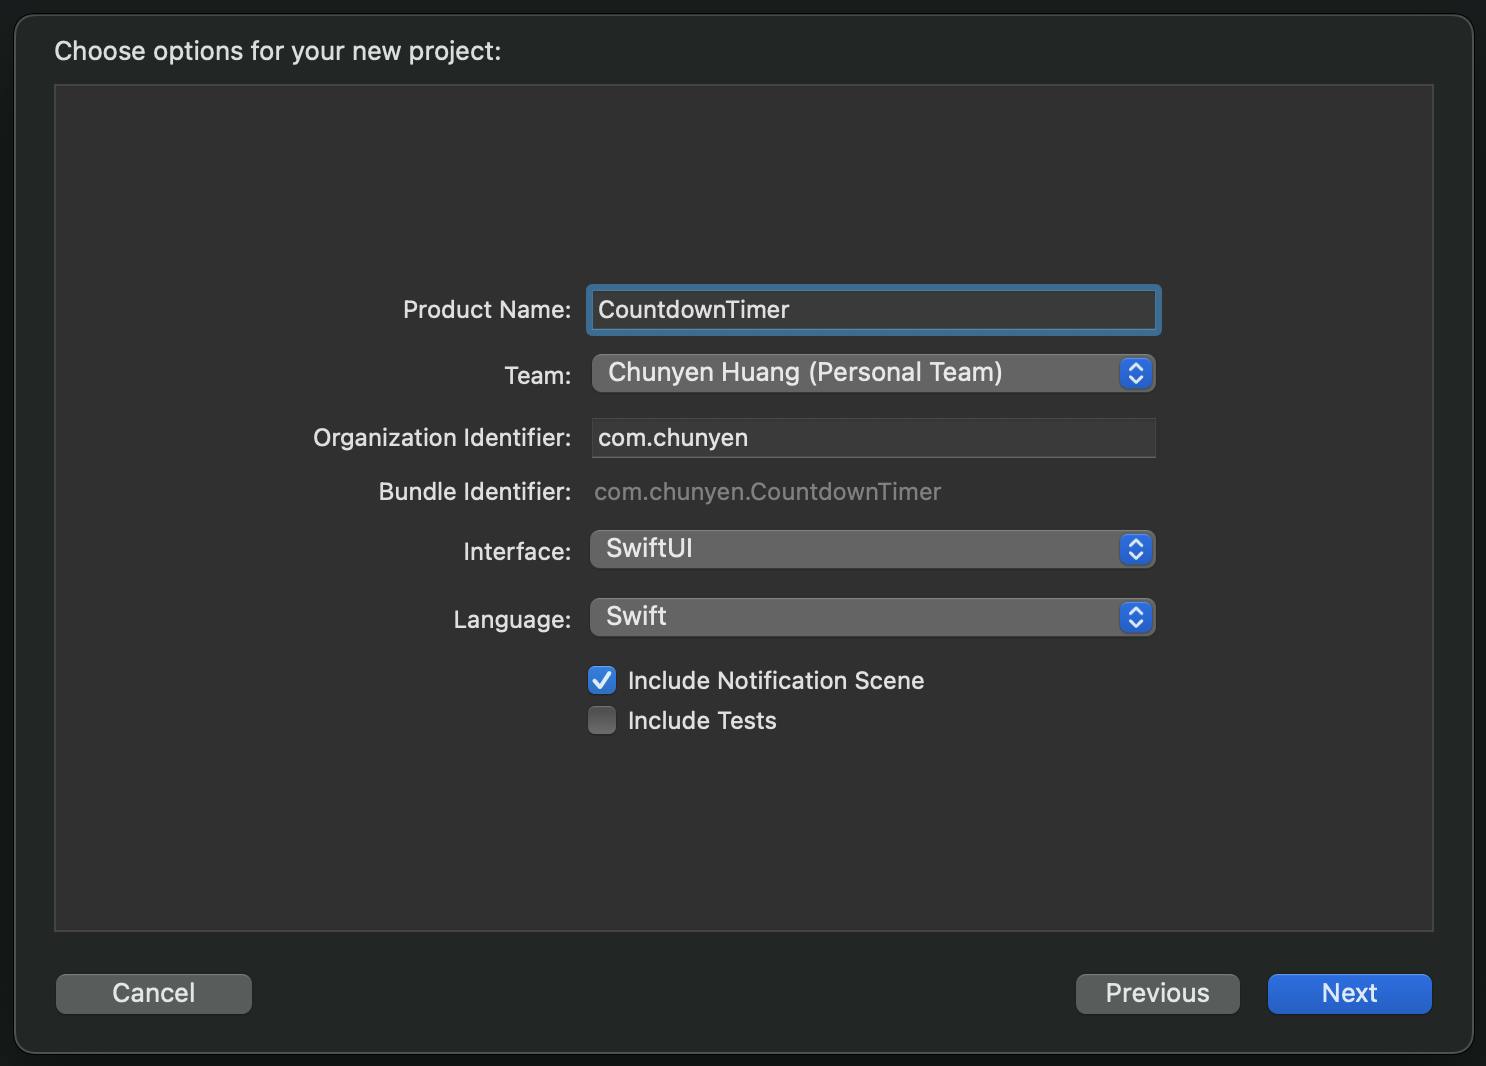
Step 2. Come up with a suitable product name. Here I use CountdownTimer as the example, then press “Next” to set up the project.
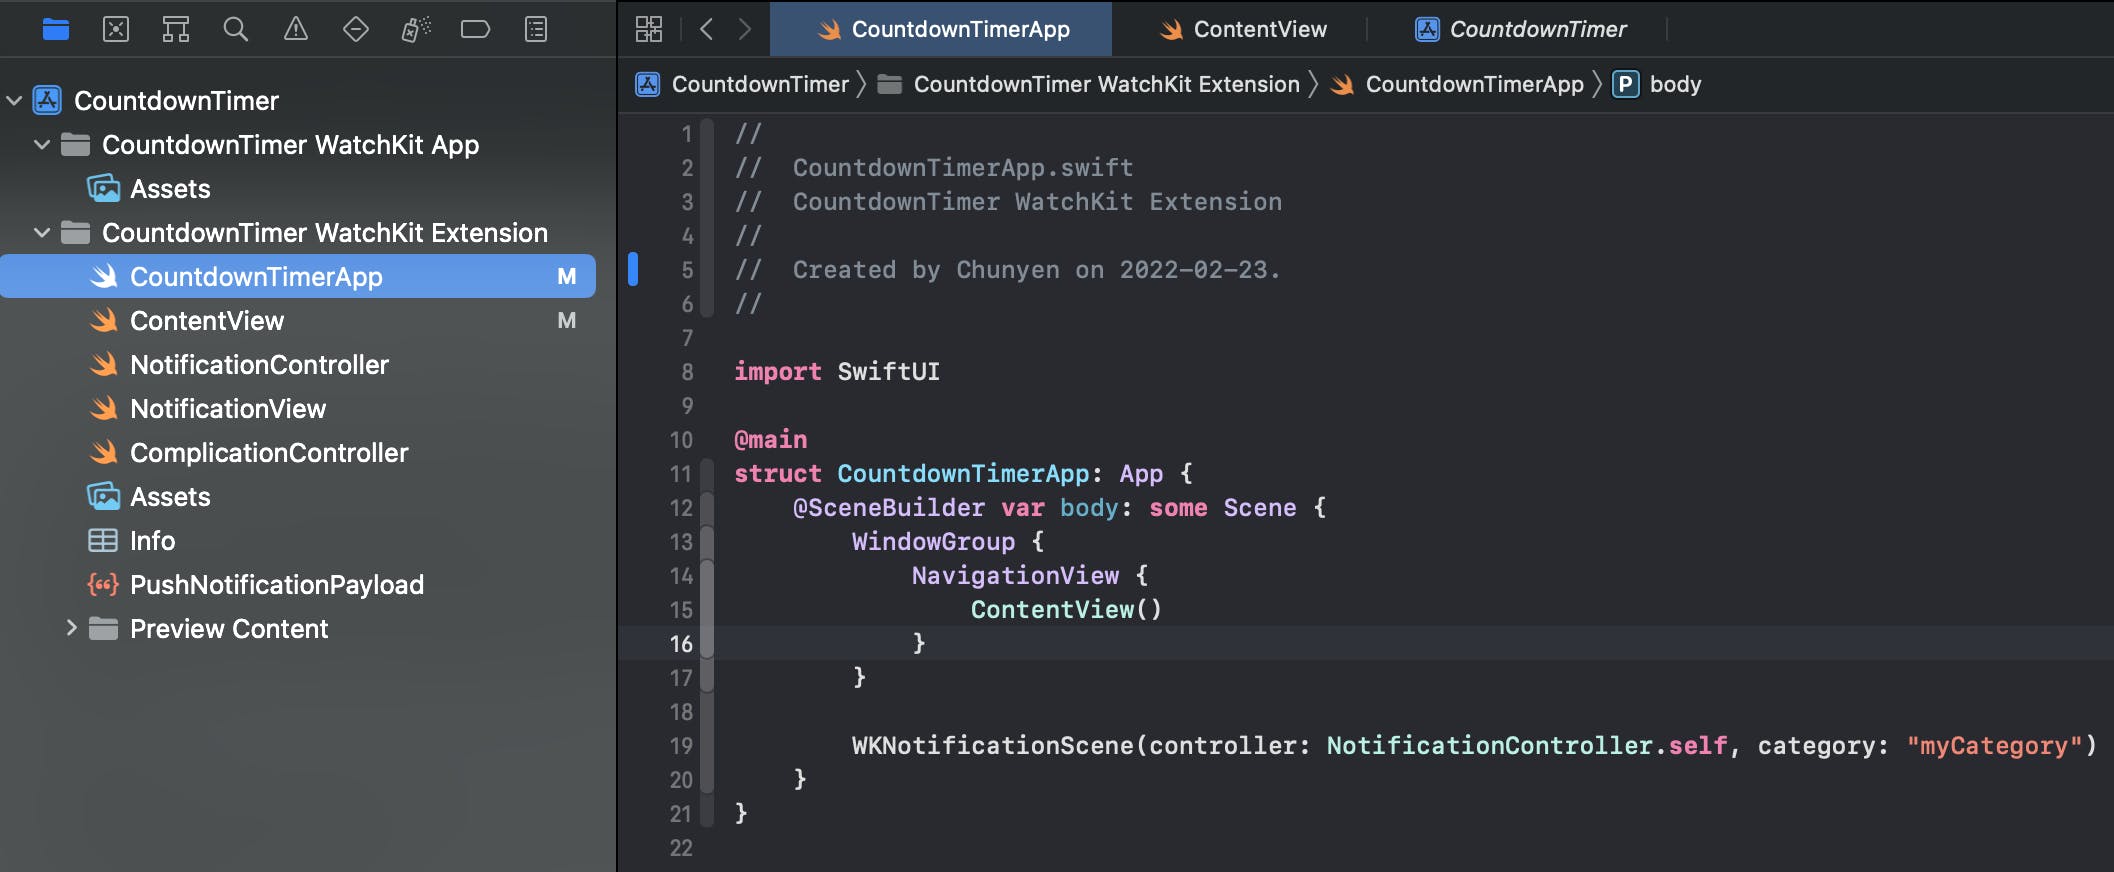
Step 3. After the project is set up successfully, you will see a bundle called CountdownTimer on the left-hand side. Inside the folder, we can see another sub-folder called CountdownTimer WatchKit Extension, this is the folder we will spend most of our time working on. First, we can take a look at CountdownTimerApp file, here is where the main function CountdownTimerApp is located in. Inside the main function, we have some Scenes which include a file name called ContentView, and this is the file we will put our code for the app UI.
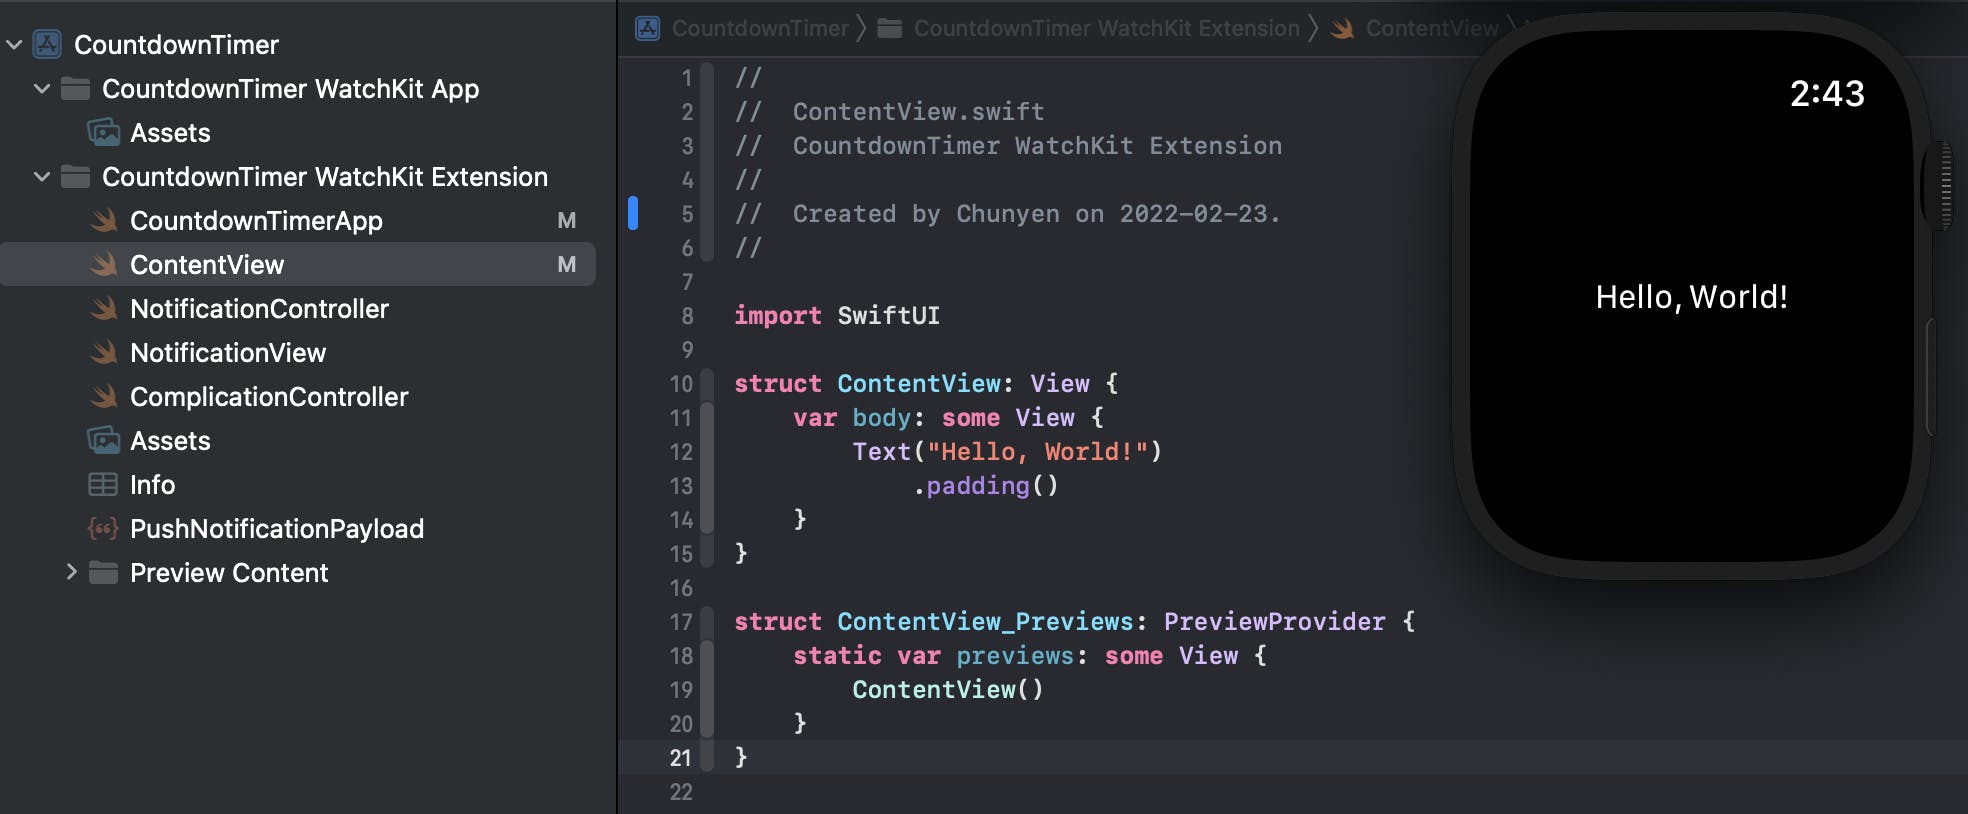
Step 4. Switch to the ContentView file, now we can see a struct called ContentView, it’s an instance of View and it also has some View inside the main body, and here we can see a line of code is Text(“Hello, world!”). Try to build and run current code, and you will find the text “Hello world!” will show on the center of the screen.
Step 5. Now back to our countdown timer. When we say that we want to build a countdown timer, which means at least in the UI, we need a text to show the number, a button to set the time, and a button to start the process. However, before we put these elements into our UI, let me introduce the Stack in Swift.
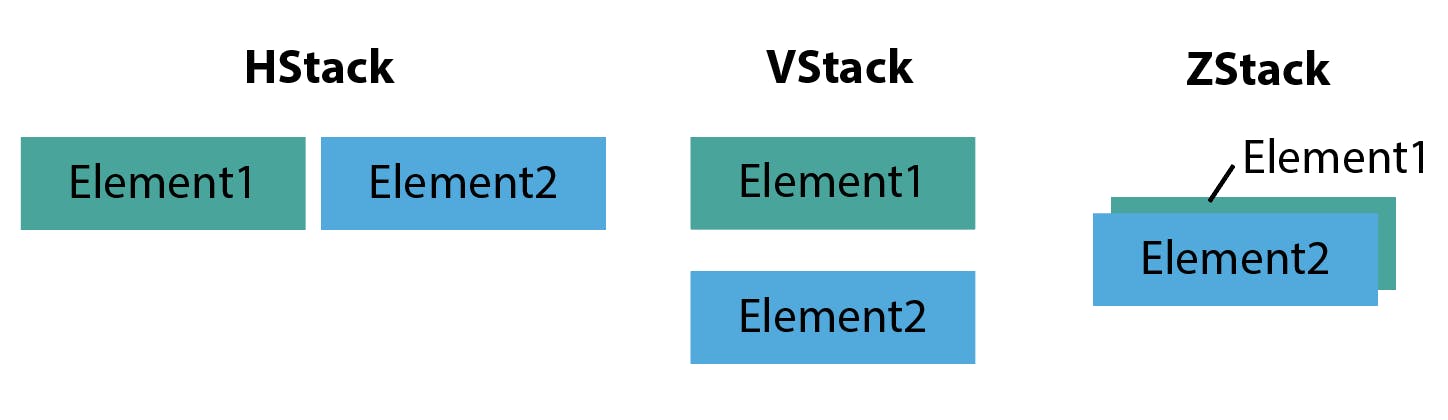
There are three types of Stack in Swift, HStack (horizontal), VStack (vertical), and ZStack (overlapped). We can use different Stack to arrange our elements in different positions and sequences.
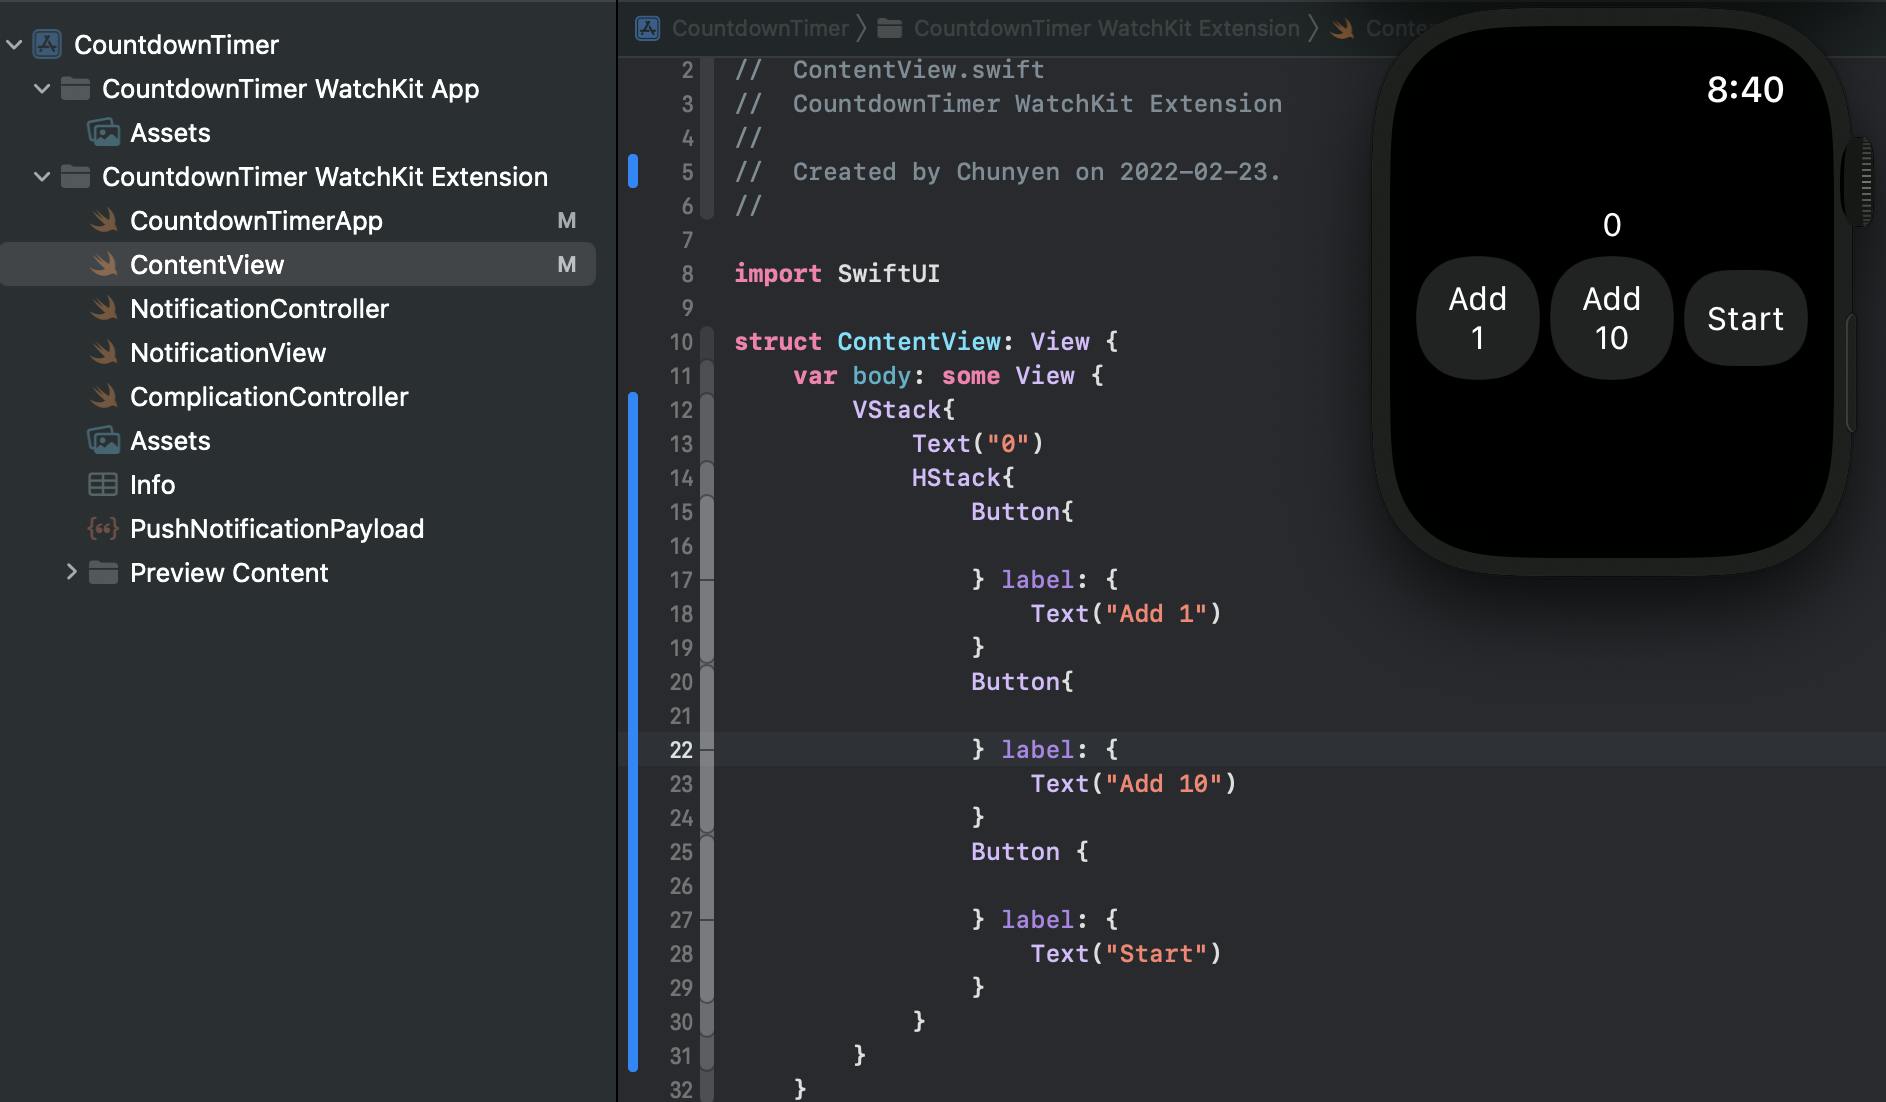
Now we can delete the Text(“Hello World!”) part. First, we add a VStack into the View, then we add another HStack inside the VStack. We want our UI to display the count number above the buttons, so we add a Text(“0”) before the inner HStack. Also, we add three buttons with different labels inside the HStack. Please notice that now we just hard-code the count number temporarily. After re-building the project, we can see we have all the elements we want on the UI.
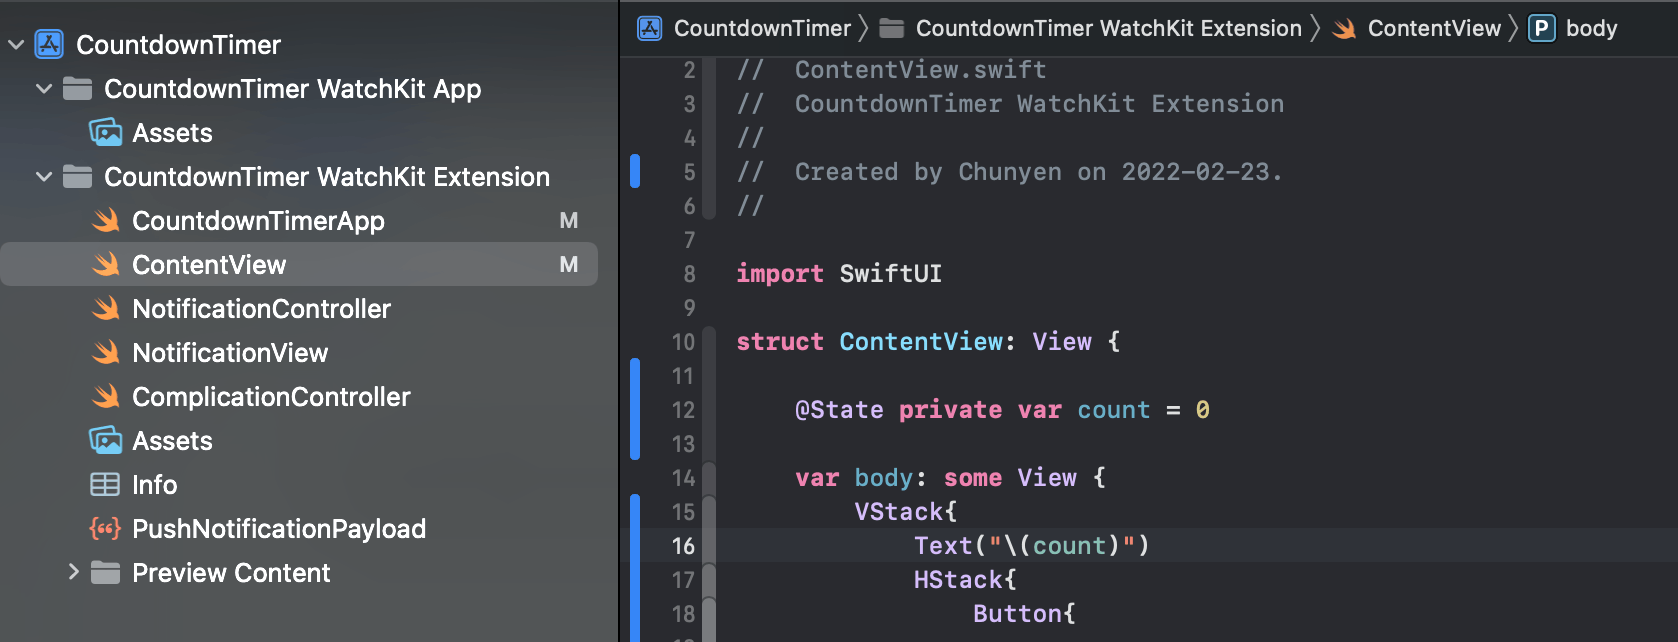
Step 6. Now we want to add different functions to these buttons, and the count number will change according to what buttons we press. To do that, we need to “observe” the number. Here we create a variable: private var count = 0, and before the word private, add @State to make this variable “observable”, then we change the word in Text from “0” to “(count)”, now it can reflect the changed number instantly.
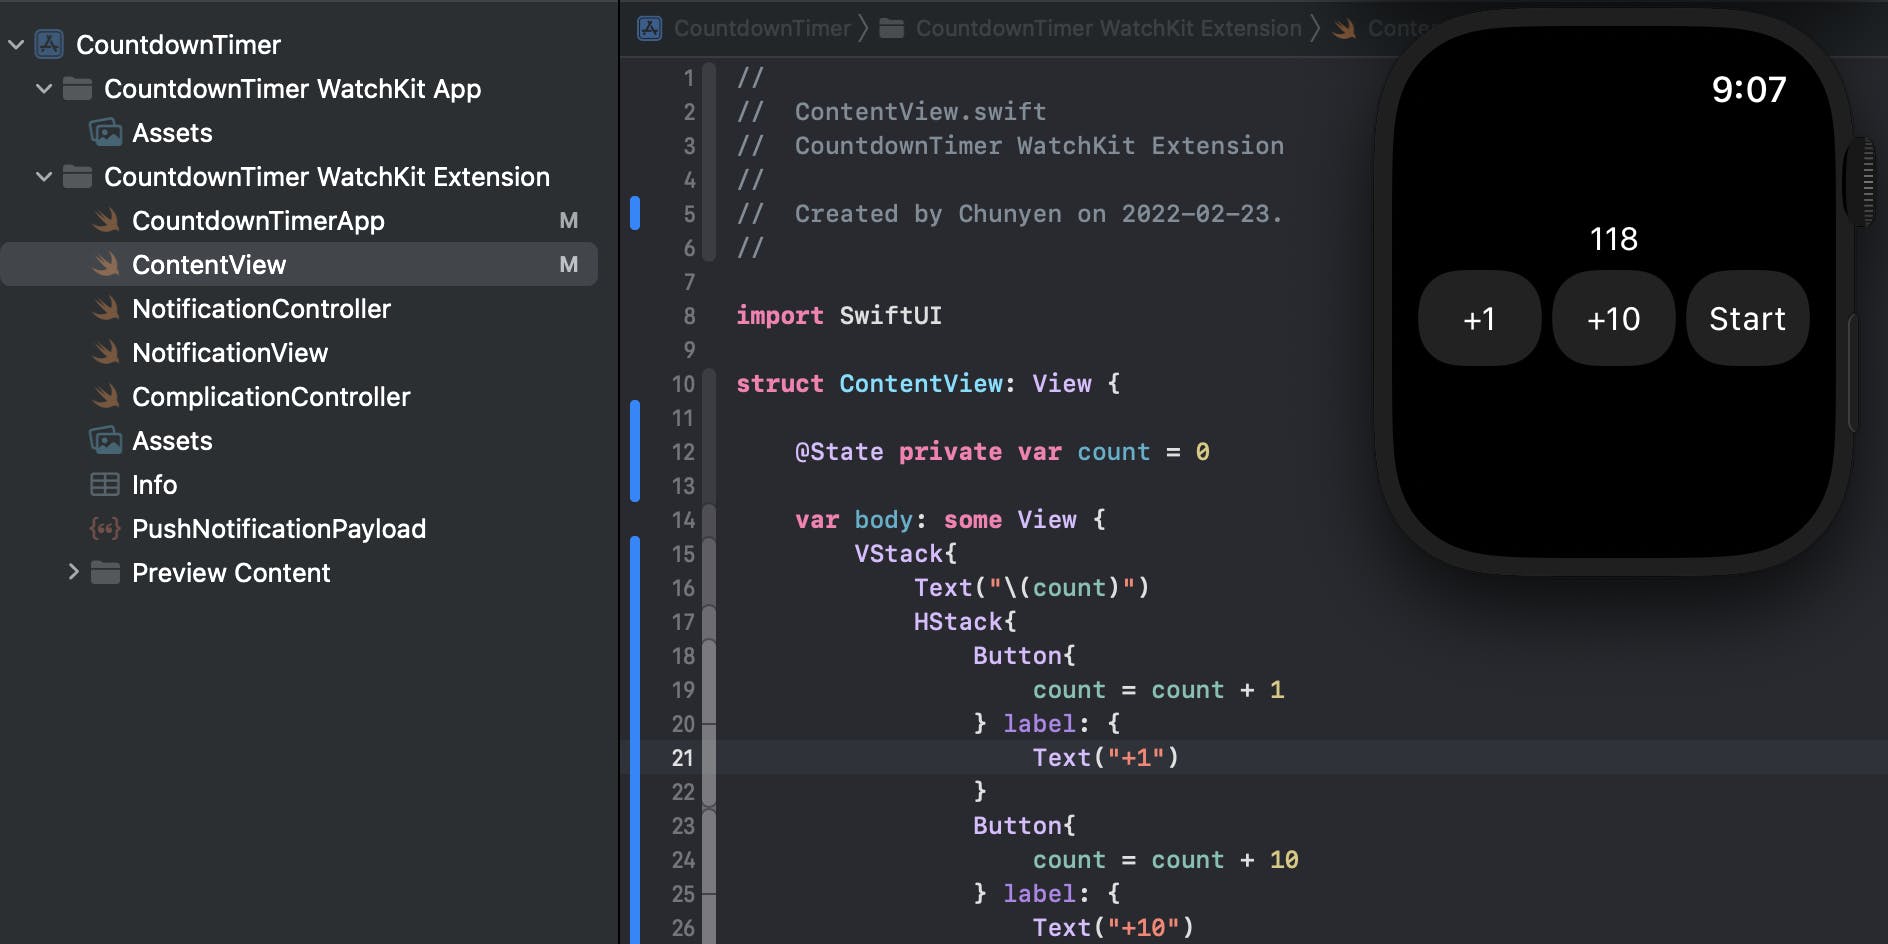
Step 7. Next, we want to focus on those button functions. For the first button, we put count = count + 1 inside the button. For the second button, we put count = count + 10. Then we re-build our project again. As you can see, now we can add 1 or 10 when we press different buttons!
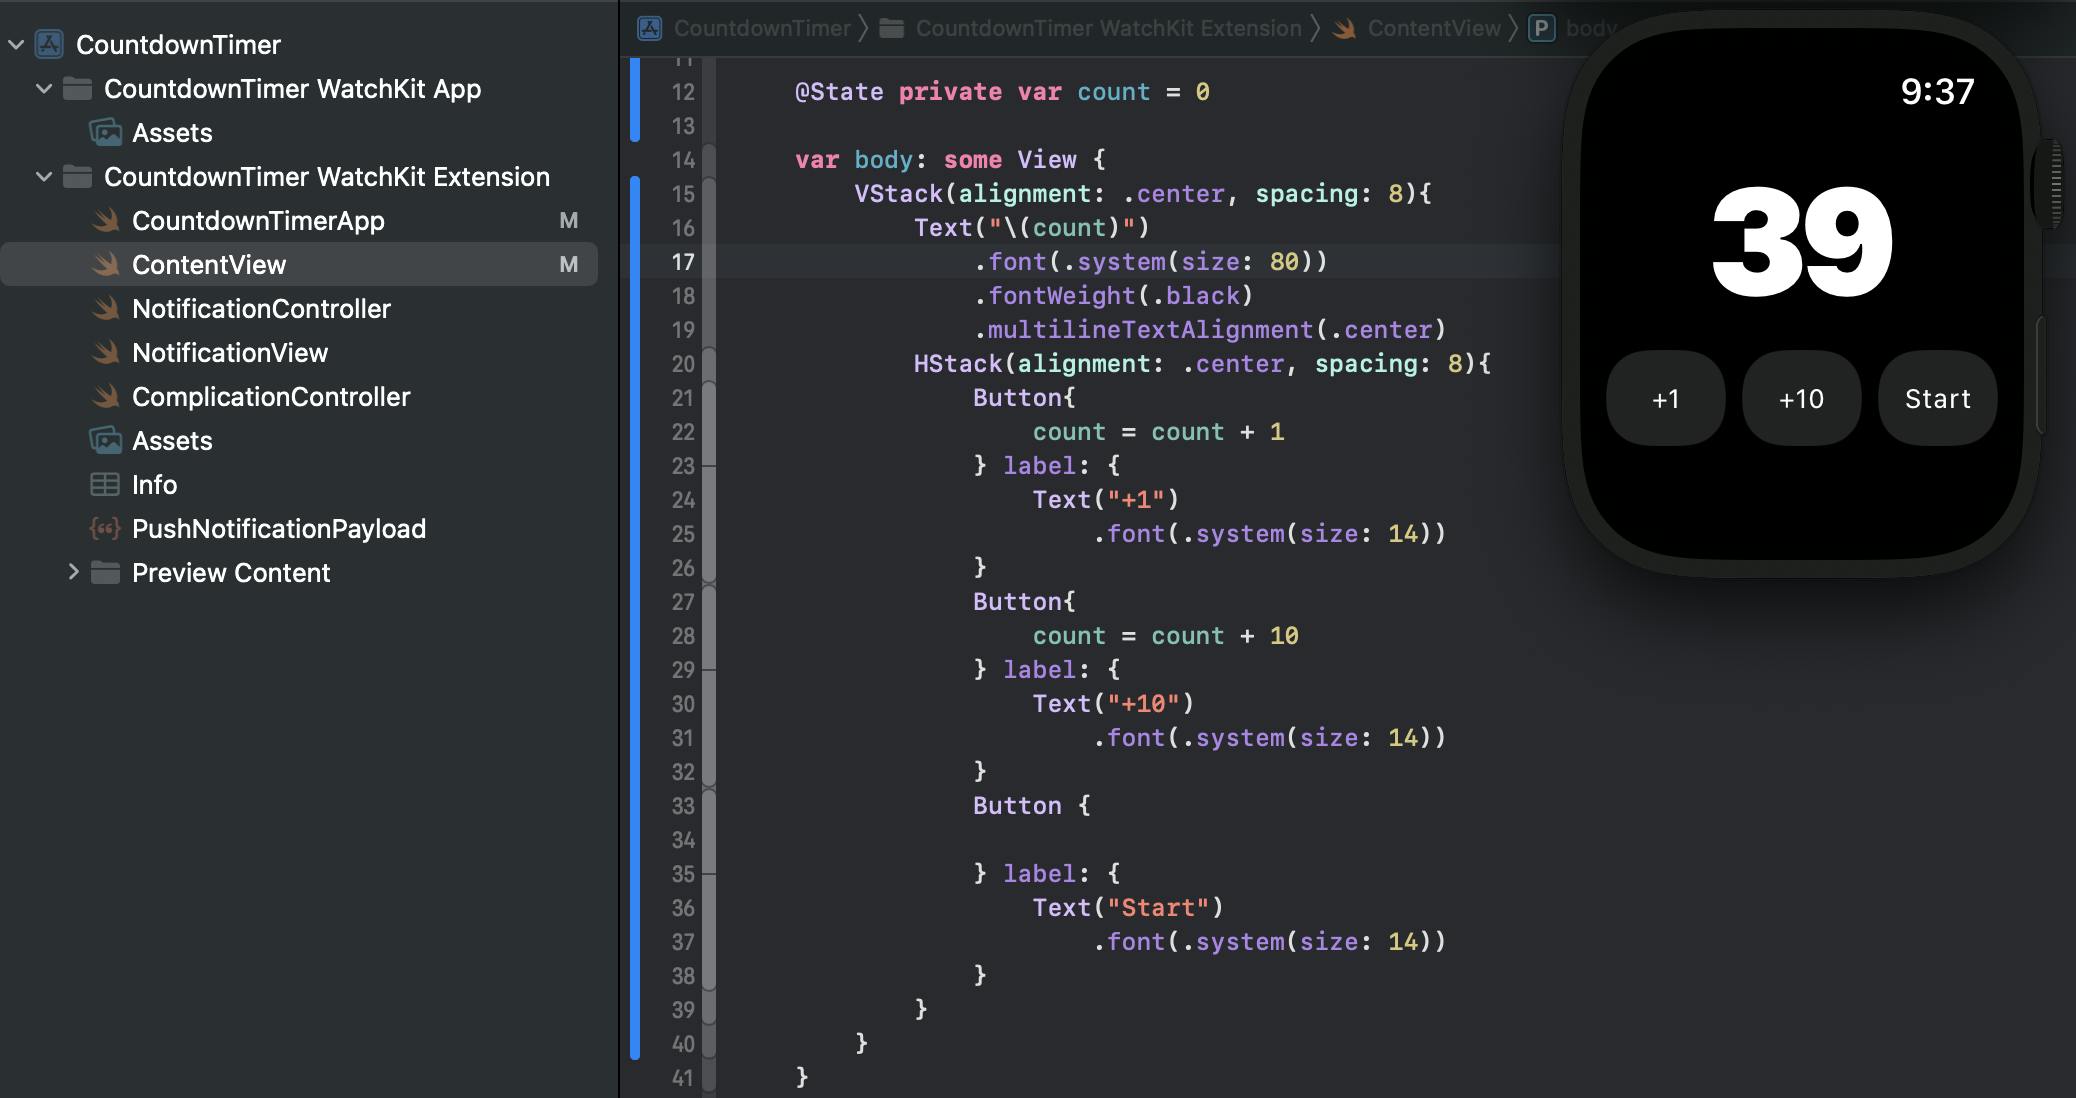
Step 8. Before we do further action, let’s make our UI looks prettier. In Swift, we can add decoration using dot notation to chain different properties after the element’s name, for example, Text().font().fontWeight(), and so on. Here I modified the font size of the text and button labels. In addition, we can change the alignment of Stack as well, here I use alignment: .center and spacing: 8 to align both HStack and VStack.
So far, we create a basic countdown timer UI with different functional buttons, later we will create other related functions to make it works.